Get The Instructions For HP OfficeJet 3830 Scanner Setup
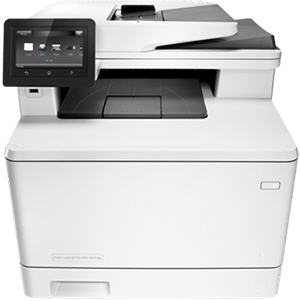
The HP Officejet 3830 is the all-in-one printer meant for printing, scanning, copying or faxing with the single machine. It means, there is no need to have a different machine setup for the different operations. You need to complete the HP OfficeJet 3830 Scanner Setup to work with the HP OfficeJet 3830 printer as the scanner. The scanner setup is not much different from the printer setup. Moreover, it is the same thing. But, there is a need to pay attention to certain things in order to use the scanner. Therefore, this blog is going to help you with the HP OfficeJet 3830 Scanner Setup in easy steps. Therefore, get ready to scan with your HP OfficeJet 3830 Scanner.

In this blog, the steps for the scanner setup are being defined for first-time use. It means, in this section, you are getting the steps for the new bought all-in-one printer. So, you will get the steps from the unpacking of the printer to the setup as a scanner. Therefore, it is going to be a complete guide for you to complete the setup from scratch.

For the unpacking of the printer properly, first, take it out from the box carefully. Now, keep it at the flat and clean surface so that the dust could not cause any issue later. Then, carefully remove all the exterior tapes from the printing equipment. Just keep in mind that you should not remove any film or tape from the ink cartridges. Also, open the scanner lid at the top, and check there should be no damage to the scanning glass.
- Step 2: Assembling the HP OfficeJet 3830 All-In-One Printer
Now, the second step is to assemble your printer so that you can use it for your scanning operation. So, to assemble it, first connect it to the power source using the power cable. Then, turn on your HP printer by pressing the power button. Then, open the input tray for the paper feeding, then insert the paper bundle into it. Now, open the ink cartridge access door, and insert the ink cartridges carefully. While inserting the ink-cartridges, make sure you are not touching the copper film, but handling it from the sides. Once, you have inserted the cartridges successfully, then close the access door, and let the printer get into idle state.
- Step 3: Do Basic and Wireless Settings On The Printer

Now, the next step to do is the basic settings on the printer’s control panel. Also, there is a need to connect the printer to the wireless network. Therefore, you will see the Select Language menu on the Control Panel of the printer. Therefore, select the language of your choice by touching the required option. Then, tap on the Yes button for the confirmation of the choice. After that, the menu for the Country/Region will display on the printer’s screen. Select your country, and then confirm your choice by selecting the Yes button. Next, select the current date and time, and then tap the Done option to complete the basic settings. Now, there is a turn to connect your printer to the wireless network. Therefore, now tap on the setup icon on your HP printer. Then, select the Wireless Setup option from there. Further, select the other method (Wireless LAN Setup) for the wireless setup than the WPS method. This will show up the list of the available WiFi networks. Select the name of your WiFi network, and enter the password for your WiFi. If your printer is connected to the network, then your wireless setup of the printer is successfully completed.
- Step 4: Completing The HP OfficeJet 3830 Scanner Setup
Now, to complete the scanner setup, you need to install the printer driver for HP OfficeJet 3830 Printer. Therefore, go to the 123.hp.com/setup, and download the full-featured printer driver for the HP OfficeJet 3830 printer. It is important to download the full-featured printer driver software as only then the driver for the printers, scanners will be installed. Upon the completion of the download of the printer driver software, install it by opening the downloaded file. So, complete the installation using the on-screen instructions. Lastly, add your printer to the system, then you are all set to use your printer. Therefore, now you can do the printing, scanning, faxing or copying with your printer very quickly.
- Step 5: Taking The Scan With The HP OfficeJet 3830 Printer Cum Scanner
Now, the last step, you are left with the HP OfficeJet 3830 Scanner Setup is taking the scan. Fior this, first, on your printer, you need to touch the icon for the Scan option. Then, put the image or document on the scanner bed whatever you want to scan, and change the settings from the printer’s display. On edit the settings, touch the Scan option on the printer. The scanned file will get appear on the Windows screen. If you find the scanned file alright, then save it in your system by clicking on the Save button. To check it, just go to the saved location, and open the file to make further settings if you want.
HP OfficeJet 3830 Printer Is Ready!
Summing up! These steps mentioned in the blog will help you to complete the HP OfficeJet 3830 Scanner Setup for the system. It means now you can take the scans with your printer. If you have completed the scanner setup, then it doesn’t mean that you cannot print with your printer. As it has been told, a full-feature printer driver will allow you to complete every operation on your printer. Therefore, you can take the printouts, scans or copies for your files with the HP OfficeJet 3830 Scanner Setup. In case, there is any issue with the setup process, then you can contact our team for expert help. So, there is no need to panic for the Scanner setup. Just complete it with us, and take the scans as you want. Now, your HP OfficeJet 3830 printer is ready for scanning.


Comments
Post a Comment